cata classic cooking guide

Cataclysm Classic Cooking Guide: A Comprehensive Overview (Updated 02/18/2026)

Today’s date is 02/18/2026! This guide details Illustrious Cooking Mastery, daily quests, achievements, and recipes spanning skill levels 451-540 within Cataclysm Classic․

Welcome to the world of Cataclysm Classic cooking! Achieving Illustrious Cooking Mastery unlocks a wealth of new recipes and opportunities for dedicated chefs․ This revamped system introduces Daily Cooking Quests available in major cities for both factions, offering Achievements upon completion․ These quests, alongside vendor-sourced recipes using Chefs Awards, form the core progression․

The journey to becoming an Illustrious Grand Master cook requires dedication and strategic recipe prioritization․ While Chefs Awards are valuable, accumulating them takes time; focusing on efficient leveling is key․ Remember, recipes are obtainable from trainers like Jon Casper (Stormwind) and Fyldan (Darnassus), offering diverse culinary paths․ Prepare to embark on a flavorful adventure!

Gaining Illustrious Cooking Mastery

Embarking on the path to Illustrious Cooking Mastery begins with visiting your cooking trainer․ This crucial step unlocks access to Cataclysm Classic’s expanded recipe repertoire, spanning skill levels from 451 to 540․ Remember, skill 451 becomes attainable at level 425, marking a significant milestone․

Beyond training, actively participating in Daily Cooking Quests is paramount․ Each major city presents five unique quests per faction, rewarding diligent cooks with valuable Achievements․ Supplementing quest rewards, Chefs Awards, earned through dedication, unlock exclusive recipes from vendors like Jon Casper and Fyldan․ Mastering this system is vital for efficient progression!

Daily Cooking Quests & Achievements

Each faction in major cities offers five distinct Daily Cooking Quests, presenting a consistent avenue for skill advancement and reward acquisition․ Completing these quests isn’t merely about leveling; it’s about unlocking prestigious Achievements that showcase your culinary dedication within Cataclysm Classic․

These daily tasks provide a steady stream of experience and resources, accelerating your journey towards Illustrious Grand Master status․ Consistent participation is key! Furthermore, the completion of all five daily quests per faction contributes towards broader achievement goals, solidifying your reputation as a skilled and committed cook․ Don’t underestimate their importance!

Chefs Awards: Acquisition and Usage

Chefs Awards are a unique currency earned through Daily Cooking Quests, serving as a vital component in acquiring rare and coveted recipes within Cataclysm Classic․ While accumulating these awards takes dedication and time, they unlock access to recipes unavailable through other means․

Specifically, Jon Casper (Stormwind) and Fyldan (Darnassus) act as primary vendors, exchanging Chefs Awards for exclusive culinary creations․ Prioritizing recipe acquisition with these awards is crucial, as it streamlines your path to Illustrious Grand Master status․ Remember, efficient spending of Chefs Awards is paramount to maximizing your cooking potential!

Essential Recipes for Illustrious Grand Master Cooks

This section highlights top-tier recipes for levels 451-540, focusing on efficiency and usefulness for Illustrious Grand Master cooks grinding new zones․

Top-Tier Recipes for Leveling 451-540

Achieving Illustrious Grand Master Cooking (skill 540) requires strategic recipe selection․ Prioritizing recipes is crucial, as Chefs Awards accumulate slowly․ Focus on high-yield experience gains, even if ingredient costs are initially higher․ Consider recipes utilizing readily available materials to minimize downtime spent gathering․

Early on, recipes requiring common ingredients from current zones will be most efficient․ As you progress, branch out to recipes utilizing materials from older content, leveraging your existing stock or alt characters for gathering․ Remember to check vendor availability – Jon Casper (Stormwind) and Fyldan (Darnassus) offer recipes purchasable with Chefs Awards, providing valuable options as you climb the skill ladder․

Prioritizing Recipes for Efficiency

Efficient leveling from 451-540 demands a calculated approach to recipe selection․ While all recipes contribute, some offer superior experience per ingredient cost․ Initially, focus on recipes utilizing materials easily sourced within current leveling zones, minimizing travel time․ Later, leverage alt characters or the Auction House for harder-to-obtain ingredients․

Don’t underestimate the value of recipes purchasable with Chefs Awards from vendors like Jon Casper and Fyldan․ These often provide a cost-effective path to higher skill levels․ Regularly evaluate your material stock and adjust your cooking focus accordingly, maximizing experience gains and minimizing wasted resources․

Recipes Available from Jon Casper (Stormwind)

Jon Casper, conveniently located outside the Stockades in Stormwind City, serves as a crucial vendor for Illustrious Grand Master cooks․ He exclusively sells recipes obtainable with Chefs Awards, accumulated through daily cooking quests and achievements․ Expect a diverse selection catering to various culinary needs, though availability may shift․

Prioritize acquiring recipes offering high skill-up potential and utilizing readily available ingredients․ Regularly check his stock, as offerings rotate․ While the initial investment of Chefs Awards can be substantial, the long-term efficiency gains in leveling and crafting outweigh the cost․ Casper’s recipes are essential for maximizing your cooking prowess․

Recipes Available from Fyldan (Darnassus)

Fyldan, found at the Craftsmens Terrace in Darnassus, mirrors Jon Casper’s role as a key vendor for advanced cooking recipes; Like Casper, Fyldan’s inventory consists entirely of recipes purchased using Chefs Awards, earned through diligent completion of daily cooking quests and associated achievements․ Players should consistently monitor his offerings․

Focus on recipes that complement your preferred cooking style and ingredient access․ While Chefs Awards require dedication to accumulate, the resulting recipes unlock significant efficiency in leveling and crafting․ Fyldan provides an alternative to Casper, ensuring accessibility for both Alliance factions․ Regularly checking his stock is vital for optimal progression․

Understanding Cooking Materials

Sourcing ingredients is crucial! Common materials are readily available, while rare and magical ingredients require dedicated exploration and reputation grinding․

Sourcing Common Ingredients

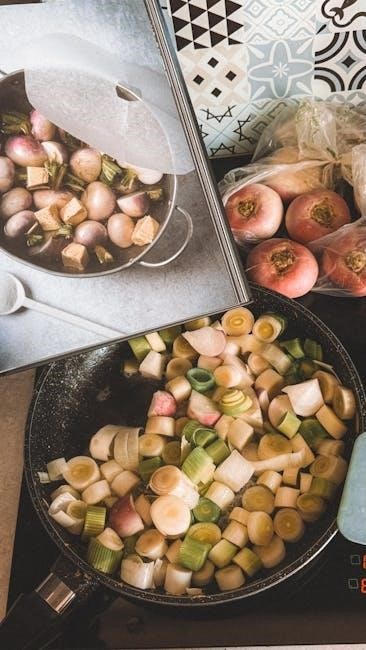
Gathering basic cooking components is the foundation of any aspiring Cataclysm Classic chef․ Many common ingredients are readily available through simple foraging and vendor purchases․ Expect to frequently collect various meats from beasts across Azeroth, including boars, deer, and wolves․ Fish can be obtained through skillful fishing in numerous zones, offering a diverse range of aquatic flavors․

Furthermore, plentiful fruits and vegetables grow wild in many regions, requiring only a bit of exploration to harvest․ Don’t underestimate the value of farm-fresh produce! Vendors in major cities consistently stock essential staples like flour, spices, and oils, ensuring a steady supply for your culinary creations․ Efficiently managing these common resources will significantly streamline your cooking progression․

Rare Ingredient Locations

Securing rare ingredients is crucial for crafting high-level Cataclysm Classic recipes․ These elusive components often require dedicated hunting and exploration․ Look to specific zones for specialized drops; for example, certain fish are exclusive to particular coastal areas․ Many rare meats come from challenging elite creatures or rare spawns found in remote locations․

Don’t overlook the potential of world drops – some ingredients can be obtained randomly from defeated mobs throughout the game․ Player auctions are also a valuable resource, though prices can fluctuate․ Remember to check vendor inventories in less-traveled areas, as some unique items appear unexpectedly․ Diligence and a bit of luck are key to acquiring these coveted ingredients!

Magical Ingredient Acquisition

Obtaining magical ingredients elevates your Cataclysm Classic cooking to new heights․ These potent components often require more than simple gathering; many are tied to specific reputations or questlines․ Certain magical herbs are only available through skilled herbalism, demanding a high skill level and knowledge of rare spawn locations․

Others are rewards for completing challenging dungeons or raids, requiring coordinated group efforts․ Don’t underestimate the power of enchanting materials – some can be transmuted into culinary ingredients․ Remember to explore profession synergies; alchemy and enchanting can provide valuable resources․ Patience and dedication are essential for mastering magical ingredient acquisition!

The Role of Reputation in Recipe Access

Faction reputation unlocks exclusive Cataclysm Classic cooking recipes, rewarding dedicated players with access to unique dishes and culinary techniques․

Faction Reputation and Cooking

Achieving high reputation with various factions in Cataclysm Classic is crucial for accessing specialized cooking recipes․ These recipes aren’t available through trainers or standard vendors; instead, they’re rewards for dedicated reputation grinding․ Each faction offers unique culinary creations reflecting their culture and regional ingredients․

Focusing on factions known for their culinary traditions, or those inhabiting zones with rare ingredients, is a smart strategy․ Building reputation unlocks daily cooking quests, providing consistent progress and valuable rewards․ Remember that Chefs Awards, while obtainable through daily quests, can take considerable time to accumulate, making faction reputation a more direct path to desired recipes․ Prioritize factions based on the recipes you need for leveling or specific content․

Specific Faction Recipe Rewards

Several factions in Cataclysm Classic offer particularly valuable cooking recipes․ For example, reaching Exalted with the Cenarion Circle unlocks recipes utilizing Twilight Highlands ingredients, essential for high-level feasts․ Similarly, the Argent Tournament provides recipes focused on bolstering combat performance, ideal for raid and dungeon content․

The Sha’tari Skyguard offers unique Outland-inspired dishes, while the Zandalari Tribe provides recipes featuring jungle ingredients․ Remember to check each faction’s vendor after reaching the appropriate reputation level․ These rewards often include recipes for powerful buffs, essential consumables, and dishes needed to complete cooking achievements․ Prioritize factions based on your desired culinary specializations․

Cooking and Secondary Professions

Archaeology synergizes with cooking by providing unique ingredients and materials, enhancing your culinary creations in Cataclysm Classic!

Synergy with Archaeology

Archaeology presents a fascinating synergy with cooking in Cataclysm Classic, offering unique opportunities to enhance your culinary skills and recipe access․ Dig sites across Azeroth yield not only artifacts but also specialized ingredients unavailable through standard gathering methods․ These archaeological finds can be crucial components in crafting high-level recipes, particularly those sought after by Illustrious Grand Master cooks․

Successfully excavating and solving archaeological puzzles rewards players with materials that directly contribute to cooking․ While the connection isn’t immediately obvious, dedicated cooks will find that investing time in Archaeology unlocks access to rare and powerful buffs, and ingredients, elevating their cooking prowess beyond conventional means․ It’s a rewarding, albeit time-consuming, path to culinary excellence․

Utilizing Gathered Materials

Gathering professions – Herbalism, Mining, and Skinning – are fundamental to efficient cooking in Cataclysm Classic․ These skills provide a consistent supply of base ingredients, reducing reliance on the Auction House and maximizing profit margins․ Herbalists secure essential herbs for potent elixirs and flavorful dishes, while miners offer crucial metals for specialized cooking tools and recipe components․

Skinning yields various meats and hides, forming the foundation of many hearty meals and powerful buffs․ Mastering these gathering skills allows cooks to control ingredient costs and quality, streamlining the leveling process and enabling consistent production of high-demand recipes․ Combining gathering with cooking creates a self-sufficient and lucrative gameplay loop for dedicated culinary adventurers․

Advanced Cooking Techniques

Mastering timing and avoiding errors are key to success! Optimize cooking times for maximum efficiency and learn to prevent common mistakes during recipe creation․

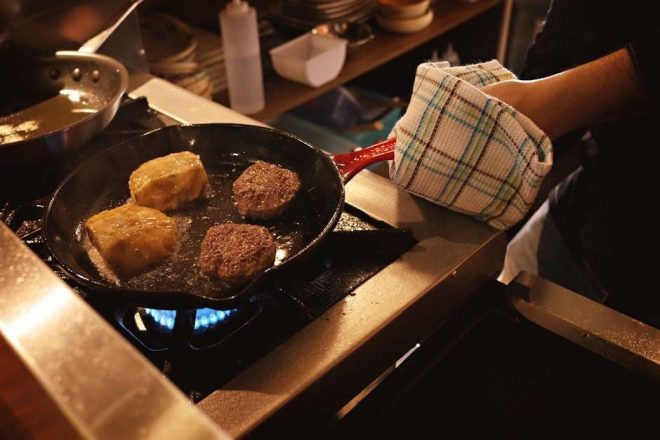
Optimizing Cooking Times

Efficient cooking is paramount for Illustrious Grand Master cooks in Cataclysm Classic․ While the game provides a base cooking time, several factors can influence the final result․ Understanding these nuances allows for significant time savings and increased productivity․ Prioritize recipes that offer the highest skill gains per cooking attempt, minimizing wasted effort․

Experiment with different cooking setups and consider utilizing any available buffs that might reduce cooking times․ Pay close attention to recipe descriptions; some may have hidden mechanics affecting duration․ Mastering these techniques will dramatically improve your leveling speed and overall cooking efficiency, allowing you to quickly reach the coveted 540 skill level and unlock all available recipes․

Avoiding Common Cooking Mistakes

Many pitfalls await aspiring cooks in Cataclysm Classic․ A frequent error is neglecting ingredient quality; always use the freshest components for optimal results․ Another common mistake involves misreading recipe requirements, leading to failed attempts and wasted materials․ Carefully double-check quantities and specific ingredient types before initiating the cooking process․

Furthermore, avoid interrupting cooking sessions mid-process, as this can result in spoiled dishes and lost progress․ Efficient inventory management is crucial to prevent accidental ingredient substitutions․ By proactively addressing these common errors, you’ll minimize frustration and maximize your success rate, swiftly progressing towards Illustrious Grand Master status․

Recipe Categories & Specializations

Cooking offers diverse specializations! Master feasts for raids, create potent potions and elixirs, or focus on unique dishes providing valuable buffs to players․

Feasts for Raids and Dungeons

Feasts are crucial for raid and dungeon success in Cataclysm Classic․ These powerful consumables provide significant stat boosts to entire groups, enhancing performance during challenging encounters․ Illustrious Grand Master cooks can craft a variety of feasts, each specializing in different stat combinations․

Prioritize feasts offering the most impactful benefits for your raid composition; Consider feasts boosting Strength, Agility, Intellect, or Stamina, depending on your group’s needs․ Some feasts may also provide Spirit regeneration or critical strike chance․ Remember that feast effects are temporary, so strategic timing is essential․ Mastering feast creation is a valuable contribution to any organized group content in Cataclysm Classic, ensuring optimal performance and increased chances of victory․

Potions and Elixirs from Cooking

While traditionally an Alchemist’s domain, Cataclysm Classic cooking offers unique potions and elixirs with distinct advantages․ These culinary concoctions provide temporary stat boosts, similar to alchemical equivalents, but often with different durations or secondary effects․ Illustrious Grand Master cooks unlock recipes for powerful restorative drinks and enhancement potions․

Focus on recipes offering benefits not readily available through Alchemy, such as unique regeneration effects or resistance buffs․ These cooking-exclusive potions can fill crucial niches in raid or PvP scenarios․ Experiment with different recipes to discover synergistic combinations with other consumables․ Mastering these culinary potions expands your utility and provides a competitive edge within Cataclysm Classic’s challenging endgame content․

Specialty Dishes for Buffs

Beyond basic stat increases, Cataclysm Classic cooking excels in crafting specialty dishes granting unique and potent buffs․ These aren’t mere stat sticks; they offer tactical advantages crucial for raiding, dungeons, and PvP combat․ Expect recipes providing temporary immunity to specific damage types, increased movement speed, or enhanced critical strike chance․

Illustrious Grand Master cooks can create dishes tailored to specific encounters, maximizing group efficiency․ Prioritize recipes offering buffs unavailable elsewhere, creating a demand for your culinary expertise․ Understanding encounter mechanics is key to selecting the optimal dish․ These specialty meals represent a significant advantage, solidifying cooking’s role as a vital profession in Cataclysm Classic․

The Art of World of Warcraft Cataclysm Cooking

Cataclysm’s cooking evolution brought Illustrious skill, new recipes, and daily quests․ This era redefined culinary importance within WoW Classic, offering unique advantages․

Historical Context of Cataclysm Cooking

Prior to Cataclysm, World of Warcraft cooking primarily focused on stat boosts and health regeneration, serving as a supportive profession․ The Cataclysm expansion dramatically altered this landscape, introducing the Illustrious skill level and a renewed emphasis on cooking’s role in endgame content․ This shift coincided with significant world changes, impacting ingredient availability and recipe acquisition․

The introduction of daily cooking quests and the Chefs Awards system created a dedicated progression path for cooks, encouraging consistent engagement․ Furthermore, the expansion’s focus on reputation with various factions unlocked exclusive recipes, tying cooking more closely to the broader WoW experience․ This era marked a turning point, elevating cooking from a secondary pursuit to a respected and rewarding profession for dedicated players․

Evolution of Cooking in WoW Classic

The re-release of Cataclysm Classic brings a nostalgic yet refined cooking experience․ Initially, cooking in Classic was rudimentary, focused on basic sustenance․ The Burning Crusade and Wrath of the Lich King expansions added complexity, but Cataclysm revolutionized the system․ The Illustrious skill level, reaching 550, demanded dedicated effort and strategic recipe choices․

Daily quests and Chefs Awards became central to progression, offering a structured path to mastery․ The integration of faction reputation further incentivized exploration and social interaction․ Cataclysm Classic faithfully recreates this evolution, allowing players to rediscover the challenges and rewards of becoming an Illustrious Grand Master cook, while benefiting from modern quality-of-life improvements․

Resources for Cataclysm Classic Cooks

Explore online databases, community forums, and useful addons to enhance your Cataclysm Classic cooking journey and master Illustrious recipes efficiently!

Online Databases and Guides

Navigating the vast world of Cataclysm Classic cooking requires reliable resources․ Several online databases meticulously catalog recipes, ingredient locations, and vendor availability, proving invaluable for aspiring Illustrious Grand Master cooks․ These platforms often feature user-submitted guides detailing efficient leveling strategies and optimal recipe prioritization․

Dedicated websites compile information on daily cooking quests, Chefs Awards acquisition, and faction reputation rewards, streamlining your progress․ Furthermore, comprehensive guides break down complex techniques like optimizing cooking times and avoiding common pitfalls․ Remember to cross-reference information from multiple sources to ensure accuracy and discover hidden gems within the Cataclysm Classic cooking system․ Utilizing these resources will significantly accelerate your path to culinary mastery․

Community Forums and Discussions

Engaging with the Cataclysm Classic cooking community unlocks a wealth of knowledge and support․ Online forums and discussion boards serve as vibrant hubs where players share tips, strategies, and discoveries related to leveling and mastering the profession․ Experienced cooks readily offer advice on efficient recipe acquisition, rare ingredient farming, and maximizing Chefs Award usage․

These platforms are ideal for seeking clarification on complex techniques, troubleshooting cooking errors, and staying abreast of the latest meta-game developments․ Participating in discussions fosters collaboration and allows you to learn from the collective experience of fellow players․ Don’t hesitate to ask questions and contribute your own insights to enrich the community’s understanding of Cataclysm Classic cooking․

Useful Addons for Cooking

Enhance your Cataclysm Classic cooking experience with specialized addons designed to streamline the process and maximize efficiency․ Several popular addons provide valuable features such as recipe tracking, ingredient cost analysis, and automated shopping list generation․ These tools help you identify the most profitable recipes, locate necessary ingredients, and manage your resources effectively․

Addons can also display real-time market prices, allowing you to capitalize on fluctuating demand and optimize your sales․ Furthermore, some addons offer cooking cooldown timers and automated crafting sequences, reducing manual effort and minimizing errors․ Explore available options and customize your interface to create a seamless and productive cooking workflow within Cataclysm Classic․

honeywell wifi thermostat installation guide

Honeywell Wi-Fi Thermostat Installation Guide

Welcome! This guide simplifies setting up your new Honeywell Wi-Fi thermostat. Installation, Wi-Fi connection, and online registration are straightforward steps for convenient control.

Welcome to the world of smart home comfort! Honeywell Wi-Fi thermostats represent a significant leap forward in home heating and cooling control, offering convenience, energy savings, and enhanced functionality. These thermostats aren’t just about setting a temperature; they’re about creating a personalized climate experience tailored to your lifestyle.

Unlike traditional thermostats, Honeywell Wi-Fi models allow you to manage your home’s temperature from anywhere with an internet connection. Through the Honeywell Home app (available for iOS and Android), you can adjust settings, create schedules, and monitor energy usage remotely. This is particularly useful for vacation homes, ensuring efficient energy use even when you’re away.

These thermostats are pre-programmed and ready to operate immediately after installation and registration. The installation process itself is designed to be user-friendly, though it’s crucial to follow safety precautions and wiring instructions carefully. Honeywell provides comprehensive resources, including installation videos and downloadable manuals, to guide you through each step. The T6 Pro model, for example, boasts a streamlined setup process with just three core steps: wiring, powering up/testing, and system configuration.

Whether you’re upgrading from an older programmable thermostat or installing a smart thermostat for the first time, Honeywell’s Wi-Fi options offer a compelling blend of performance, reliability, and ease of use. They are compatible with a wide range of heating and cooling systems, making them a versatile choice for many homes.

Safety Precautions Before Installation

Your safety is paramount! Before commencing any work on your heating or cooling system, it is absolutely essential to disconnect the power supply. Turn OFF the mains power at the breaker box or fuse box that controls your HVAC system. This prevents electrical shock and potential damage to the thermostat or your system.

Installation should ideally be performed by a competent person, someone familiar with low-voltage wiring and HVAC systems. If you are uncomfortable working with electrical wiring, we strongly recommend hiring a qualified professional. Incorrect wiring can lead to system malfunction, fire hazards, or damage to your equipment.

Always double-check that the power is completely off before touching any wires. Use a non-contact voltage tester to confirm the absence of electricity. Be mindful of the wiring itself; avoid bending or damaging the wires during removal or installation. Carefully label each wire as you disconnect it from the old thermostat – this is crucial for correct reconnection.

Read the entire installation guide thoroughly before starting. Familiarize yourself with the wiring codes (R, W, Y, G, C) and understand their functions. Keep children and pets away from the work area. Following these precautions will ensure a safe and successful installation process, protecting both you and your home.

Tools and Materials Needed

To ensure a smooth Honeywell Wi-Fi thermostat installation, gather the following tools and materials beforehand. A small screwdriver (both flathead and Phillips head) is essential for removing and securing screws on the thermostat and wall plate. You’ll also need a level to guarantee the thermostat is mounted straight for optimal display readability and aesthetic appeal.

A wire stripper/cutter is crucial for preparing the wires for connection, ensuring clean and secure terminations. Wire labels or masking tape and a pen are vital for accurately identifying each wire during removal from your old thermostat – preventing confusion during reconnection. A non-contact voltage tester is a must-have safety tool to confirm the power is off before handling any wiring.

Depending on your wall type, you might require drill bits and a drill for creating mounting holes. Wall anchors may also be necessary if you’re installing the thermostat on drywall or other soft surfaces. Finally, have your smartphone or tablet readily available for the Wi-Fi connection and app setup process. Having these items prepared will streamline the installation and minimize delays.

Identifying Your Existing Thermostat Wiring

Before disconnecting your old thermostat, carefully document the existing wiring. This is arguably the most critical step for a successful Honeywell Wi-Fi thermostat installation. Turn off the power to your HVAC system at the breaker box – safety first! Remove the thermostat cover to expose the wiring terminals.

Using your wire labels or masking tape and pen, meticulously label each wire according to its terminal letter. Common terminal designations include R, W, Y, G, and C. Take a clear photograph of the wiring configuration as a backup reference. Note the wire colors associated with each letter; however, color coding isn’t standardized, so rely on the terminal labels.

The ‘R’ wire typically provides power, ‘W’ controls heating, ‘Y’ controls cooling, ‘G’ operates the fan, and ‘C’ is the common wire – essential for Wi-Fi functionality. If you lack a ‘C’ wire, you may need to investigate options like a C-wire adapter. Carefully observe any jumper wires connecting terminals, as these also need to be documented. Accurate identification prevents incorrect wiring and potential system damage.

Understanding Honeywell Thermostat Wiring Codes (R, W, Y, G, C)

Decoding your thermostat wiring is crucial for a smooth Honeywell Wi-Fi installation. Let’s break down the common terminal codes. ‘R’ signifies power – it’s the 24V hot wire supplying energy to your thermostat. There might be ‘Rh’ for heating and ‘Rc’ for cooling; if so, Honeywell often requires a jumper between them, or the thermostat handles it internally.

‘W’ activates the heating system, signaling your furnace or heat pump to turn on. ‘Y’ controls cooling, engaging your air conditioner. ‘G’ operates the fan, circulating air regardless of heating or cooling. The ‘C’ wire is the common wire, completing the circuit and providing a return path for the 24V signal – essential for Wi-Fi connectivity.

Without a ‘C’ wire, your thermostat may struggle to maintain a consistent Wi-Fi connection. Some systems utilize other wires for common functions, but a dedicated ‘C’ wire is preferred. Understanding these codes ensures correct wiring, preventing system malfunctions. Refer to your HVAC system’s documentation for specific wiring configurations, and always prioritize safety by disconnecting power before working with wires.

Removing Your Old Thermostat

Safety first! Before you begin, completely shut off power to your HVAC system at the breaker box. This is a non-negotiable step to prevent electrical shock. Once confirmed off, carefully remove the cover of your existing thermostat. You may need a small screwdriver to loosen screws or release clips.

Document the wiring! Before disconnecting any wires, take a clear photograph of the existing wiring configuration. This photo will be an invaluable reference during the Honeywell installation. Label each wire with the corresponding terminal letter (R, W, Y, G, C) using small pieces of tape. This prevents confusion later.

Gently disconnect each wire from its terminal; Avoid pulling on the wires themselves; instead, press the release lever on the terminal to loosen the wire. Once all wires are disconnected, carefully remove the old thermostat’s baseplate from the wall. Be mindful of any wall anchors or screws. Now you’re ready to install the Honeywell backplate!

Backplate Installation

Mounting the backplate: Position the Honeywell thermostat backplate on the wall where your old thermostat was located. Ensure it’s level for a professional appearance. Use the provided screws and wall anchors if necessary, especially if you’re covering old screw holes. The anchors provide a secure hold in drywall.

Wiring access: The backplate features openings to accommodate the thermostat wires. Carefully feed the wires through these openings. Avoid crimping or damaging the wires during this process. Ensure sufficient wire length is available for easy connection to the Honeywell thermostat terminals.

Secure the backplate: Once the wires are properly positioned, securely fasten the backplate to the wall using the screws. Do not overtighten, as this could damage the backplate or the wall. Double-check that the backplate is firmly mounted and level before proceeding to the wiring stage. A stable backplate is crucial for a successful installation.

Wiring the Honeywell Wi-Fi Thermostat

Connecting the wires: Carefully connect each wire to the corresponding terminal on the Honeywell thermostat backplate. Refer to the wiring diagram specific to your system and the wiring codes (R, W, Y, G, C) identified earlier. Ensure each wire is securely inserted into the terminal – a loose connection can cause operational issues.

Terminal identification: Double-check that each wire is connected to the correct terminal. Incorrect wiring can damage the thermostat or your HVAC system. If you are unsure about any connection, consult a qualified HVAC technician. The ‘C’ wire, providing constant power, is often essential for Wi-Fi functionality.

Wire security: Gently tug on each wire after insertion to confirm it’s firmly held in place. Avoid excessive force. Once all wires are connected, carefully tuck any excess wire back into the wall opening, ensuring they don’t interfere with the thermostat mounting. Proper wiring is paramount for reliable operation.

Powering Up and Initial Thermostat Test

Restoring power: After verifying all wiring connections, carefully restore power to your HVAC system at the circuit breaker. Observe the thermostat display – it should illuminate, indicating it’s receiving power. If the display remains blank, re-check the wiring, particularly the ‘C’ wire connection, and the breaker status.

Initial system check: Begin a preliminary system test by setting the thermostat to ‘Heat’ and raising the temperature a few degrees above the current room temperature. Verify that the heating system activates. Then, switch to ‘Cool’ and lower the temperature to trigger the cooling system. Listen for the expected operation of each system.

Basic functionality verification: Confirm the fan operates correctly in both ‘Auto’ and ‘On’ modes. Note any unusual noises or behaviors during these initial tests. If any issues arise, immediately turn off the power and revisit the wiring connections. A competent person should handle any complex issues.

Connecting to Your Home Wi-Fi Network

Initiating Wi-Fi setup: On your Honeywell thermostat, navigate to the network settings menu. This is typically found within the thermostat’s settings or configuration options. The thermostat will begin searching for available Wi-Fi networks in your area. Ensure your home Wi-Fi network is broadcasting and discoverable.

Network selection and password entry: From the list of detected networks, select your home Wi-Fi network. You will then be prompted to enter your Wi-Fi password. Use the thermostat’s keypad or touchscreen to accurately input the password, paying attention to capitalization and special characters.

Connection confirmation: Once the password is entered, the thermostat will attempt to connect to your Wi-Fi network. A successful connection will be indicated by a Wi-Fi symbol appearing on the thermostat display. If the connection fails, double-check the password and ensure your router is functioning correctly. Registration online is the next step for remote access.

Thermostat Display and Basic Navigation

Understanding the display: Your Honeywell Wi-Fi thermostat features a user-friendly display providing essential information. Typically, you’ll see the current room temperature, the setpoint temperature, the operating mode (heat, cool, auto, off), and the Wi-Fi connection status. Some models also display the outdoor temperature and humidity.

Navigating the menus: The thermostat utilizes a combination of touchscreen controls and physical buttons for navigation. Use the up and down arrows to adjust the setpoint temperature. A “Menu” or “Settings” button accesses advanced options like scheduling, system configuration, and network settings. Explore the menus to familiarize yourself with available features.

Keypad functionality: For basic setup functions, the keypad allows direct configuration. The installer setup customizes the thermostat to specific systems. The display’s intuitive layout ensures easy operation for both simple temperature adjustments and more complex programming tasks. Refer to the user manual for detailed explanations of each function.

Registering Your Thermostat Online for Remote Access

Unlock remote control: Registering your Honeywell Wi-Fi thermostat online is crucial for accessing its full potential. This enables control via the Honeywell Home app, allowing adjustments from anywhere with an internet connection. Registration is a simple process, typically initiated through the thermostat’s display or the Honeywell Home website.

Creating an account: You’ll need to create a Honeywell Home account, providing a valid email address and creating a secure password. This account serves as your central hub for managing your thermostat and accessing its features. Ensure you remember your login credentials for future access.

Linking your thermostat: During registration, the system will guide you through linking your thermostat to your account. This usually involves entering the thermostat’s unique identification number, found on the device itself or its packaging. Once linked, you can immediately begin using the Honeywell Home app to control your home’s temperature remotely, set schedules, and monitor energy usage.

Using the Honeywell Home App

Total control at your fingertips: The Honeywell Home app is your primary interface for managing your Wi-Fi thermostat remotely. After successful registration, download the app from your device’s app store (iOS or Android) and log in with your Honeywell Home account credentials.

Key features: The app provides a user-friendly dashboard displaying your current home temperature and allowing for immediate adjustments. You can easily create and modify heating and cooling schedules tailored to your lifestyle, optimizing comfort and energy savings. Geofencing features automatically adjust the temperature based on your location.

Advanced settings: Explore advanced settings within the app to customize your thermostat’s behavior. Monitor energy usage reports to identify potential savings opportunities. Receive alerts for extreme temperatures or system malfunctions. The app also facilitates firmware updates, ensuring your thermostat operates with the latest features and security enhancements. Enjoy convenient, connected home comfort!

Installer Setup and Customization

Tailoring to your system: The Installer Setup mode allows professionals to fine-tune the Honeywell Wi-Fi thermostat to perfectly match your specific heating and cooling system configuration. Access this mode through a dedicated sequence on the thermostat’s keypad, requiring specialized knowledge.

Advanced parameters: Within Installer Setup, technicians can configure parameters like heating and cooling stages, fan control settings, and system type (e.g., forced air, heat pump). Proper configuration ensures optimal performance and efficiency. Adjustments are made to accommodate unique system requirements, maximizing comfort and minimizing energy waste.

Customization options: Beyond basic settings, Installer Setup enables customization of display preferences, temperature offsets, and advanced scheduling options. These features provide a personalized experience. While basic setup is achievable via the keypad, Installer Setup unlocks the full potential of the thermostat, delivering a truly optimized and customized climate control solution.

Troubleshooting Common Installation Issues

Power problems: If the thermostat doesn’t power on, double-check the C-wire connection – a common culprit. Ensure it’s securely connected at both the thermostat and furnace/air handler. Verify the furnace power switch is on. A missing or improperly connected C-wire often prevents operation.

Wi-Fi connectivity: Difficulty connecting to Wi-Fi? Confirm your network is 2.4 GHz, as many thermostats don’t support 5 GHz. Check the Wi-Fi password and signal strength. Restarting the thermostat and router can often resolve connection issues. Ensure the thermostat is within range of your Wi-Fi signal.

Incorrect system operation: If heating or cooling isn’t functioning correctly, revisit the wiring connections. Verify they match your system type and the wiring codes (R, W, Y, G, C). Incorrect wiring can lead to reversed operation or system failure. Consult the wiring diagram and double-check each connection. Refer to Honeywell’s extensive online resources and downloadable manuals for detailed troubleshooting steps.

brass knuckles battery instructions

Article Plan: Brass Knuckles Battery Instructions

This comprehensive guide details safe operation, charging, maintenance, and troubleshooting for Brass Knuckles batteries, ensuring optimal performance and longevity.

Brass Knuckles batteries have become increasingly popular within the vaping community, known for their robust design and compatibility with a variety of oil cartridges. Understanding these batteries is crucial for a safe and enjoyable experience. These aren’t your standard, run-of-the-mill power sources; they’re engineered for specific voltage outputs and often feature variable settings to customize your vaping session.

Proper usage begins with recognizing the battery’s intended purpose – powering oil-based vaporizers. Ignoring safety guidelines or using incompatible chargers can lead to malfunction, damage, or even hazardous situations. This guide will provide detailed instructions, covering everything from identifying your specific model to troubleshooting common issues, ensuring you maximize your battery’s lifespan and prioritize your safety.

Understanding Battery Types

Brass Knuckles batteries predominantly utilize Lithium-Ion technology due to its high energy density and relatively stable performance. While older technologies like Nickel-Metal Hydride exist, they are rarely found in modern vaping devices due to lower capacity and voltage output. Lithium-Ion batteries offer a consistent power supply crucial for optimal vaporization.

Battery Capacity (mAh) dictates how long your battery will last on a single charge; higher mAh means longer use. Voltage determines the power delivered to the atomizer, influencing vapor production and flavor intensity. Brass Knuckles batteries often offer adjustable voltage settings, allowing users to tailor their experience. Understanding these specifications is key to selecting the right battery for your needs;

Lithium-Ion vs. Nickel-Metal Hydride

Lithium-Ion (Li-ion) batteries excel in energy density, offering more power for their size and weight – vital for portable devices like vaping pens. They exhibit a slower self-discharge rate, holding charge longer when not in use. However, Li-ion requires careful handling due to potential safety concerns if damaged or misused.

Nickel-Metal Hydride (NiMH) batteries are older technology, generally less expensive but with lower energy density. They suffer from a higher self-discharge rate and deliver less consistent voltage. While safer in terms of thermal runaway, their performance limitations make them unsuitable for modern, high-demand applications like powering Brass Knuckles vaporizers. Li-ion is the clear superior choice.

Battery Capacity (mAh) and Voltage

Battery Capacity (measured in milliampere-hours or mAh) dictates how long your Brass Knuckles battery will power your device on a single charge. Higher mAh equates to longer usage. Common capacities range from 900mAh to over 2000mAh, influencing session length.

Voltage is crucial for optimal vaporization. Brass Knuckles batteries typically operate at 3.7V, but some offer variable voltage settings for customized experiences. Matching the battery voltage to your cartridge’s requirements is essential for flavor and vapor production. Incorrect voltage can lead to poor performance or damage. Always verify compatibility!

Safety Precautions

Prioritize safety when using Brass Knuckles batteries. Always handle Lithium-Ion batteries with care, avoiding punctures, crushing, or exposure to extreme temperatures. Never leave charging batteries unattended and keep them away from flammable materials. Use only compatible chargers to prevent overcharging or deep discharge, both of which can damage the battery and pose a fire risk.

Inspect batteries regularly for signs of damage like swelling, leakage, or corrosion. Discontinue use immediately if any damage is detected. Store batteries in a cool, dry place, away from direct sunlight and metal objects. Improper handling can lead to hazardous situations.

Handling Lithium-Ion Batteries

Lithium-Ion batteries powering Brass Knuckles devices require careful handling. Avoid physical damage – punctures, drops, or crushing can cause short circuits and thermal runaway. Never disassemble or modify the battery pack. Exposure to extreme heat (direct sunlight, fire) or cold significantly reduces performance and safety.

Always use appropriate protection. Do not handle damaged or leaking batteries; contact a qualified disposal facility. Store batteries in a non-conductive container, separate from metal objects to prevent accidental shorting. Proper handling minimizes risks associated with these powerful energy sources.

Avoiding Overcharging and Deep Discharge

Protect your Brass Knuckles battery’s lifespan by avoiding extremes. Overcharging stresses the battery, reducing capacity and potentially causing hazards. Disconnect the charger once the battery reaches full charge; do not leave it connected overnight. Conversely, deep discharge – allowing the battery to drain completely – can also cause irreversible damage.

Regular, partial charges are ideal. Aim to keep the battery between 20% and 80% charge for optimal health. Utilize the battery’s indicator lights to monitor charge levels and avoid both overcharging and complete depletion, maximizing its usability and safety.

Identifying Your Brass Knuckles Battery Model

Accurate model identification is crucial for proper charging and maintenance. Brass Knuckles offers various battery types, each with specific requirements. Locate the model number, typically printed on the battery casing – often near the charging port or on a label. This number is essential when seeking compatible chargers or troubleshooting issues.

Refer to your product packaging or purchase records if the label is unclear. Knowing your battery model ensures you’re using the correct voltage and charging protocols, preventing damage and maximizing performance. Incorrect charging can void warranties and pose safety risks, so verification is key.

Charging Instructions ⸺ General Guidelines

Always use a compatible charger specifically designed for lithium-ion batteries, and ideally one recommended by Brass Knuckles. Before charging, inspect the battery for any physical damage – do not charge damaged batteries. Ensure the charging port is clean and free of debris. Connect the charger securely to both the battery and a reliable power source.

Avoid charging in extreme temperatures or direct sunlight. Monitor the charging process and disconnect the battery once fully charged. Never leave a charging battery unattended for extended periods. Following these guidelines will help prolong battery life and ensure safe operation.

Recommended Chargers

For optimal charging, Brass Knuckles recommends utilizing dedicated wall chargers designed for lithium-ion batteries, offering a stable and efficient power delivery. These chargers typically feature overcharge protection, enhancing battery safety and longevity. Alternatively, high-quality portable power banks with compatible output voltages and amperages can provide convenient on-the-go charging.

Avoid using generic or low-quality chargers, as they may deliver inconsistent power or lack essential safety features. Ensure the charger’s output matches the battery’s specifications. Regularly inspect charging cables for damage and replace them if frayed or compromised.

Wall Chargers

Brass Knuckles batteries benefit from dedicated wall chargers specifically engineered for lithium-ion power sources. These chargers provide a consistent and regulated power flow, crucial for maximizing battery lifespan and preventing damage. Look for chargers featuring built-in safety mechanisms like overcharge and short-circuit protection, safeguarding against potential hazards.

Ensure the wall charger’s output voltage and amperage align precisely with your battery’s requirements – typically 5V/2A. Using an incompatible charger can lead to reduced performance or even battery failure. Always use a reputable brand and inspect the charger and cable regularly for any signs of wear or damage.

Portable Power Banks

Portable power banks offer convenient on-the-go charging for your Brass Knuckles battery, ideal for situations where a wall outlet isn’t accessible. When selecting a power bank, prioritize models with a stable output and compatibility with lithium-ion devices. A power bank with at least 5V/2A output is generally recommended for optimal charging speed.

Verify the power bank’s capacity (mAh) to determine how many full charges it can provide. Look for power banks with built-in safety features, such as overcharge protection and temperature control. Always use a high-quality USB cable to connect your battery to the power bank for a reliable connection.

Charging Process ⸺ Step-by-Step

Begin by securely connecting your Brass Knuckles battery to the chosen charger (wall adapter or power bank) using a compatible USB cable. Ensure the connection is firm to prevent interruptions during charging. Observe the battery’s indicator light; it should illuminate to signal charging has commenced.

Allow the battery to charge undisturbed until the indicator light signals a full charge – typically a change in color or a steady illumination. Avoid using the battery while it’s charging, as this can prolong the charging time and potentially reduce battery lifespan. Once fully charged, disconnect the battery from the charger immediately.

Indicator Lights and What They Mean

Understanding your Brass Knuckles battery’s indicator light is crucial for monitoring its status. A flashing light generally signifies that the battery is currently charging and accumulating power. The color of the flashing light can also be informative; red often indicates a low charge, while blue or green suggests a partial charge.

A solid, non-flashing light typically means the battery is fully charged and ready for use. However, some models may use different colors to indicate full charge status. If the indicator light doesn’t illuminate at all, it could signal a battery malfunction or a charger issue requiring investigation.

Troubleshooting Charging Issues

If your Brass Knuckles battery isn’t charging, first verify the charger and cable are functioning correctly with another device. Ensure a secure connection between the charger, cable, and battery. A slow charging speed could indicate a faulty cable, an incompatible charger, or a deeply discharged battery requiring extended charging time.

Try a different USB port or wall outlet. If problems persist, clean the battery’s charging contacts with a dry cloth. Avoid using the battery while it’s charging, as this can impede the process. If none of these steps resolve the issue, the battery may be damaged and require replacement.

Battery Not Charging

If your Brass Knuckles battery refuses to charge, begin by confirming the power source – ensure the outlet works and the USB port is functional with another device. Inspect the charging cable for any visible damage, like fraying or bends, and try a different, known-good cable. A loose connection is a common culprit; firmly connect the cable to both the charger and the battery’s charging port.

Attempt charging using a different USB adapter or wall charger. If still unresponsive, gently clean the battery’s charging contacts with a soft, dry cloth to remove any potential obstructions. A completely depleted battery might take a while to register charging.

Slow Charging Speed

Experiencing sluggish charging with your Brass Knuckles battery? Several factors could be at play. Using a low-output charger (like a phone charger with only 1A output) will significantly extend charging times. Opt for a charger specifically designed for vape batteries, providing at least 2A of power. The USB cable also matters; a damaged or low-quality cable can restrict current flow.

Ensure no other power-intensive devices are simultaneously drawing power from the same outlet or USB hub. A nearly full battery will naturally charge slower as it approaches capacity. Finally, ambient temperature can affect charging speed – extreme heat or cold can impede the process.

Battery Storage Best Practices

Proper storage is crucial for maintaining Brass Knuckles battery health and lifespan. Ideally, store batteries in a cool, dry environment, away from direct sunlight and extreme temperatures. A storage charge of around 40-60% is recommended; avoid storing fully charged or completely depleted batteries for extended periods.

If storing for longer than a few weeks, periodically check the charge level and top it up if necessary. Keep batteries in a non-conductive container, like a plastic case, to prevent accidental short circuits. Avoid storing with metallic objects. Never leave batteries unattended in hot vehicles or exposed to moisture.

Recognizing a Damaged Battery

Identifying a damaged Brass Knuckles battery is vital for safety. Look for physical signs like swelling, bulging, or leaking. These indicate internal damage and a potential fire hazard. Discontinue use immediately if you observe any of these issues.

Other warning signs include excessive heat during charging or use, unusual odors, or difficulty powering your device. A battery that won’t hold a charge, even after a full charge cycle, may also be damaged. Do not attempt to repair a damaged battery; proper disposal is essential.

Proper Battery Disposal

Responsible disposal of your Brass Knuckles battery is crucial for environmental protection and safety. Lithium-ion batteries should never be thrown in regular trash. They pose a fire risk and can leach harmful chemicals into the environment.

Instead, locate a designated battery recycling center. Many electronics stores and local recycling facilities accept used batteries. Check with your municipality for specific drop-off locations. Properly taping the terminals prevents short circuits during transport. Avoid puncturing or disassembling the battery before disposal. Following these guidelines ensures a safe and eco-friendly process.

Understanding Battery Terminology (Related to Brass/Copper Alloys)

While batteries don’t contain brass or copper alloys in their core chemistry, these metals play vital roles in connectivity. Brass, an alloy of copper and zinc, is frequently used for battery terminals and connectors due to its good conductivity and corrosion resistance.

Copper’s excellent electrical conductivity is fundamental to battery function, forming essential wiring and internal components. Nickel-plated brass offers enhanced durability and prevents oxidation. Understanding these materials highlights how metal properties contribute to reliable power transfer within the battery system and overall device performance.

Brass as a Connector Material

Brass frequently appears in Brass Knuckles battery connectors due to its advantageous properties. As a copper-zinc alloy, it delivers substantial electrical conductivity, though slightly less than pure copper, at a more affordable cost. Its inherent corrosion resistance prevents degradation from battery chemicals and environmental factors, ensuring a stable connection over time.

Furthermore, brass is relatively easy to machine and form, allowing for precise connector manufacturing. Nickel-plated brass is common, adding an extra layer of protection against corrosion and improving the connector’s overall durability. This material choice balances performance, cost, and longevity.

Copper’s Role in Conductivity

Copper is fundamental to the functionality of Brass Knuckles batteries, serving as a primary conductor of electrical current. Its exceptional conductivity, surpassing most other metals, minimizes energy loss during charging and discharging, maximizing battery efficiency. Within the battery’s internal components and often within brass alloy connectors, copper facilitates the flow of electrons.

Even when alloyed with zinc to create brass, copper retains a significant contribution to conductivity. The presence of copper ensures reliable power transfer to the vaping device. Its malleability also allows for the creation of intricate wiring and connection points within the battery’s compact design, vital for consistent performance.

Battery Maintenance Tips

To prolong the life of your Brass Knuckles battery, regularly clean the charging contacts with a dry, lint-free cloth to remove any residue. Avoid exposing the battery to extreme temperatures, both hot and cold, as this can degrade performance. Store batteries in a cool, dry place when not in use, ideally at around 50-70°F (10-21°C).

Periodically check for any physical damage, such as dents or cracks. Do not use a damaged battery. Always use a compatible charger designed for lithium-ion batteries. Avoid dropping the battery, as internal damage may not be visible. Consistent, proper maintenance ensures optimal functionality and safety.

Warranty Information

Brass Knuckles batteries are covered by a limited warranty against defects in materials and workmanship for a period of 30 days from the date of purchase. This warranty does not cover damage resulting from misuse, abuse, accidents, unauthorized modifications, or improper charging. Proof of purchase is required for all warranty claims.

To initiate a warranty claim, contact the retailer where the battery was purchased or visit the official Brass Knuckles website for instructions. The warranty is void if the battery has been tampered with or disassembled. This warranty provides repair or replacement, at our discretion.

Frequently Asked Questions (FAQ)

Q: How long does a Brass Knuckles battery last? A: Battery life varies based on usage, but typically provides several hours of continuous use; Q: Can I use any USB charger? A: We recommend using the provided charger or a compatible 5V/2A charger. Q: Why isn’t my battery charging? A: Ensure the charger and cable are working, and the battery isn’t deeply discharged.

Q: What do the indicator lights mean? A: Lights indicate charging status and battery level. Q: Is it safe to leave the battery on the charger overnight? A: No, avoid overcharging. Disconnect once fully charged.

Where to Find Additional Support

For detailed troubleshooting, warranty claims, and frequently updated information, please visit the official Brass Knuckles website at [insert official website address here]. Our comprehensive online support portal features a searchable knowledge base, detailed product manuals, and instructional videos covering all aspects of battery operation and maintenance.

You can also reach our dedicated customer support team via email at [insert support email address here] or by phone at [insert phone number here] during business hours. Follow us on social media [insert social media links] for product updates and community support.

Proper care and understanding of your Brass Knuckles battery are crucial for safe and optimal performance. By adhering to the guidelines outlined in this guide – from charging procedures and safety precautions to storage best practices and troubleshooting tips – you can maximize the lifespan and reliability of your device.

Remember, responsible battery handling is paramount. Always prioritize safety, avoid misuse, and consult official resources for any uncertainties. A well-maintained Brass Knuckles battery ensures a consistent and enjoyable vaping experience, providing long-lasting power and satisfaction.

maryland accommodations manual

The Maryland Assessment, Accessibility, and Accommodations Policy Manual (MAAAM) details a five-step process for effective accommodation use, benefiting diverse learners across the state.

Purpose of the Manual

The core purpose of the Maryland Assessment, Accessibility, and Accommodations Policy Manual – often referred to as The MAAAM or simply The Manual – is to provide a comprehensive, standardized framework for selecting, implementing, and evaluating instructional and assessment accommodations. This ensures equitable access to learning and accurate demonstration of knowledge for all students, specifically those with disabilities and English learners.

The Manual aims to guide educators through a five-step process, fostering informed decisions based on individual student needs rather than broad categorizations. Furthermore, it establishes clear guidelines for tracking student performance with accommodations and incorporating data from previously accommodated students – those ‘exited’ from special education – into Maryland’s Accountability Program reporting for a two-year period. This contributes to a holistic view of student progress and program effectiveness.

Target Audience

The information contained within the Maryland Assessment, Accessibility, and Accommodations Policy Manual (The MAAAM or The Manual) is intentionally broad in scope, designed to be applicable and beneficial to a wide range of educational professionals throughout Maryland. This includes, but is not limited to, general education teachers, special education staff, English Language Development (ELD) specialists, school administrators, and assessment coordinators.

Essentially, anyone involved in the instructional or assessment process for students who may benefit from accommodations is considered a key member of the target audience. This extends to personnel within Maryland’s Education Services, as their performance on state assessments is now tracked. The Manual serves as a vital resource for ensuring consistent and appropriate accommodation practices across all Maryland schools and districts, ultimately supporting student success.

Understanding Accommodations

Accommodations enable students to fully participate in instruction and assessments, allowing them to better demonstrate their knowledge and skills effectively.

Definition of Accommodations

Accommodations, as defined within the Maryland Assessment, Accessibility, and Accommodations Policy Manual, are changes to how a student learns or demonstrates learning. These adjustments do not alter what is being taught or assessed. Instead, accommodations level the playing field, providing access for all students to showcase their true abilities.

Crucially, accommodations are individualized and based on specific student needs, not simply a disability category or instructional level. They are designed to remove barriers to learning and assessment, ensuring equitable opportunities. Examples include changes in presentation format, response methods, or scheduling. The focus remains on accurate measurement of a student’s knowledge and skills, without compromising the integrity of the assessment itself.

These supports are vital for students with disabilities and English learners, fostering inclusive educational practices throughout Maryland.

Importance of Individualized Needs

The Maryland Assessment, Accessibility, and Accommodations Policy Manual (MAAAM) strongly emphasizes that accommodations must be rooted in a student’s unique and individual needs. A one-size-fits-all approach is explicitly discouraged; effective accommodations are not determined by a student’s disability label, their placement, or the amount of time spent in general education.

Instead, the focus should be on a thorough understanding of each student’s strengths and areas where they encounter barriers to learning or assessment. This requires careful observation, data collection, and collaboration among educators, parents, and, when appropriate, the student themselves.

Individualized accommodations ensure that students can demonstrate their knowledge and skills accurately, promoting equitable access to education and fostering a truly inclusive learning environment across Maryland’s schools.

Distinction Between Accommodations and Modifications

The Maryland Assessment, Accessibility, and Accommodations Policy Manual (MAAAM) clarifies a crucial distinction: accommodations change how a student learns material, while modifications change what a student is expected to learn. Accommodations aim to level the playing field, allowing a student to access the same content and demonstrate understanding without altering expectations.

Examples of accommodations include extended time, preferential seating, or assistive technology. Modifications, conversely, alter the curriculum or learning goals, potentially lowering expectations.

The MAAAM stresses that accommodations are the preferred approach, as they maintain the integrity of the curriculum and provide students with opportunities to master grade-level content. Modifications should be considered carefully and only when accommodations are insufficient to meet a student’s needs in Maryland.

The Five-Step Accommodation Process

The Maryland Assessment, Accessibility, and Accommodations Policy Manual (MAAAM) presents a structured five-step process for selecting, administering, and evaluating accommodations.

Step 1: Identification of Student Needs

The initial step within the Maryland Assessment, Accessibility, and Accommodations Policy Manual’s five-step process centers on thoroughly identifying each student’s unique learning requirements. This isn’t based on a disability category, instructional level, or time spent in general education, but rather on individual needs.

Effective identification requires a comprehensive understanding of the student’s strengths and areas where they encounter challenges, impacting their ability to demonstrate knowledge and skills accurately. Educators must gather data from various sources – classroom observations, assessments, and input from parents or guardians – to build a complete picture.

This detailed understanding forms the foundation for selecting appropriate accommodations, ensuring they directly address the student’s specific needs and promote equitable access to instruction and assessment. Accurate identification is paramount for successful accommodation implementation.

Step 2: Accommodation Selection

Following the identification of student needs, the Maryland Assessment, Accessibility, and Accommodations Policy Manual guides educators through the careful selection of appropriate accommodations. This selection must be individualized, directly linked to the previously identified learning needs, and designed to enable full participation in instruction and assessments.

The manual emphasizes that accommodations should not alter the core content being assessed but rather provide access. Educators should consider a range of options, from presentation accommodations (e.g., large print) to response accommodations (e.g., assistive technology), and scheduling adjustments.

A collaborative approach, involving special education staff and parents, is crucial to ensure the chosen accommodations are both effective and appropriate for the student’s specific circumstances. The goal is to level the playing field, allowing students to demonstrate their true knowledge and skills.

Step 3: Accommodation Implementation

Successful accommodation implementation, as outlined in the Maryland Assessment, Accessibility, and Accommodations Policy Manual, requires careful planning and consistent execution. Educators must ensure all staff involved – including general education teachers, special education personnel, and assessment administrators – are thoroughly familiar with the student’s specific accommodations.

This includes providing necessary materials, training on assistive technologies, and establishing clear procedures for administering accommodations during both instruction and assessments. Maintaining a consistent approach is vital to minimize disruption and maximize the student’s ability to focus on demonstrating their knowledge.

Proper documentation of accommodation implementation is also essential, serving as evidence of adherence to the student’s plan and informing future evaluation efforts. The manual stresses proactive preparation to ensure a smooth and equitable assessment experience.

Step 4: Accommodation Monitoring

The Maryland Assessment, Accessibility, and Accommodations Policy Manual emphasizes continuous monitoring of accommodation effectiveness. This crucial step involves regularly observing students during instruction and assessments to determine if the implemented accommodations are, in fact, supporting their access to learning and accurate demonstration of skills.

Monitoring isn’t simply about checking if an accommodation is being used, but how it’s impacting the student’s performance and engagement. Educators should collect data – anecdotal notes, work samples, assessment results – to track progress and identify any necessary adjustments.

Consistent monitoring allows for timely intervention, ensuring accommodations remain appropriate and beneficial throughout the year. This proactive approach supports individualized learning and maximizes student success, aligning with the manual’s core principles.

Step 5: Accommodation Evaluation

The final step in the Maryland Assessment, Accessibility, and Accommodations Policy Manual’s five-step process is a thorough evaluation of accommodation effectiveness. This isn’t a one-time event, but rather an ongoing cycle of review and refinement based on the data collected during the monitoring phase.

Evaluation requires analyzing student performance data – assessment scores, classroom work, and observational notes – to determine if the accommodations are achieving their intended purpose. Are students demonstrating improved access to instruction and more accurate representation of their knowledge?

If accommodations aren’t proving beneficial, the team must revisit the process, potentially selecting different accommodations or modifying existing ones. This iterative approach ensures accommodations remain aligned with individual student needs and contribute to meaningful academic progress.

Specific Accommodation Categories

The Manual addresses accommodations for students with disabilities, English learners, and those with current Section 504 plans, ensuring equitable access to learning.

Accommodations for Students with Disabilities

Accommodations empower students with disabilities to fully engage in instruction and assessments, accurately reflecting their knowledge and skills. These supports are individually tailored, moving beyond disability categories or instructional settings. The Maryland Assessment, Accessibility, and Accommodations Policy Manual (MAAAM) emphasizes a process where accommodations are determined by specific student needs.

This ensures that each student receives the precise support required for success. Accommodations don’t alter what is being taught or assessed, but rather how a student accesses information and demonstrates understanding. Examples include extended time, preferential seating, and assistive technology. Careful consideration and documentation are crucial throughout the five-step accommodation process outlined in the Manual, guaranteeing appropriate and effective support for all students with disabilities.

Accommodations for English Learners

The Maryland Assessment, Accessibility, and Accommodations Policy Manual (MAAAM) recognizes the unique needs of English Learners (ELs) and provides guidance for appropriate accommodations. These accommodations aim to level the playing field, allowing ELs to demonstrate their knowledge without being hindered by language barriers. It’s vital to remember that accommodations must be individualized, based on a student’s proficiency level and specific linguistic challenges, not simply applied as a blanket approach.

Examples of accommodations for ELs include providing glossaries, allowing the use of dictionaries, and offering translated test directions. The MAAAM’s five-step process ensures a systematic approach to identifying needs, selecting appropriate supports, and monitoring their effectiveness. The goal is to accurately assess what ELs know and can do, separate from their English language proficiency.

Section 504 Plan Accommodations

The Maryland Assessment, Accessibility, and Accommodations Policy Manual (MAAAM) clarifies the role of Section 504 plans in relation to state assessments. Students with a current, valid Section 504 plan are eligible for accommodations on these assessments, even if they are no longer receiving special education services. However, it’s crucial to understand that students who have “exited” special education are not automatically eligible for accommodations unless supported by a current 504 plan.

These accommodations, outlined within the individual’s 504 plan, must be consistently applied during testing. The MAAAM emphasizes that accommodations should address the impact of the disability and allow the student to participate equitably. Tracking performance data for students with 504 accommodations is essential for accountability reporting, ensuring all learners have opportunities to demonstrate their abilities.

Accountability and Assessment Reporting

Maryland tracks Education Services performance on state Assessments, including exited students for two years in the Accountability Program reporting, within the Special Education group.

Tracking Student Performance with Accommodations

Effective tracking of student performance when utilizing accommodations is crucial for understanding their impact and ensuring equitable assessment practices throughout Maryland. The Maryland Assessment, Accessibility, and Accommodations Policy Manual (The MAAAM) emphasizes the importance of systematically monitoring how accommodations influence student outcomes.

This involves collecting data on student progress, analyzing assessment results, and identifying any patterns or trends related to specific accommodations. Educators should document which accommodations were provided, the context in which they were used, and the student’s response. This detailed record-keeping allows for informed decisions regarding accommodation adjustments and future instructional planning.

Furthermore, understanding how accommodations affect performance helps to validate their effectiveness and ensures that all students have a fair opportunity to demonstrate their knowledge and skills. Careful tracking also supports accountability measures and contributes to the continuous improvement of assessment practices within the state’s educational system.

Inclusion of Exited Students in Accountability Reporting

Maryland’s Accountability Program incorporates a specific provision for students who have “exited” special education services, ensuring a comprehensive view of student progress and school performance. According to the Maryland Assessment, Accessibility, and Accommodations Policy Manual (The MAAAM), these students are included in accountability reporting for a period of two years following their exit from special education;

This inclusion allows the state to monitor the continued success of these students and assess the long-term impact of previously provided accommodations and interventions. It’s important to note, however, that exited students are only eligible to receive accommodations on state assessments if they maintain a current Section 504 plan.

This practice provides a more accurate and nuanced understanding of student outcomes, moving beyond a snapshot in time and recognizing the ongoing support needs of students transitioning from special education services. This contributes to a more equitable and effective accountability system.